ZoomAPIは2023年6月1日をもってJWT認証が廃止されます。
それに伴いZoomAPIを使う際にJWT認証からServer-to-Server OAuth認証に置き換える必要があります。
この記事はPythonでServer to Server Oautu認証によりZoomAPIを使って会議を作成するサンプルプログラムになります。参考になりましたら幸いです。
なお、サンプルプログラムはGitHubリポジトリからダウンロードできます。
https://github.com/attack-on-fukukai/sample_python_zoomapi
PythonでServer to Server Oautu認証によるZoomAPIの使い方
まずServer-to-Server OAuth認証を行うためにアプリを登録して「Account ID」「Client ID」「Client secret」を取得する必要があります。以下の手順を参考にアプリを登録してください。
アプリの登録手順
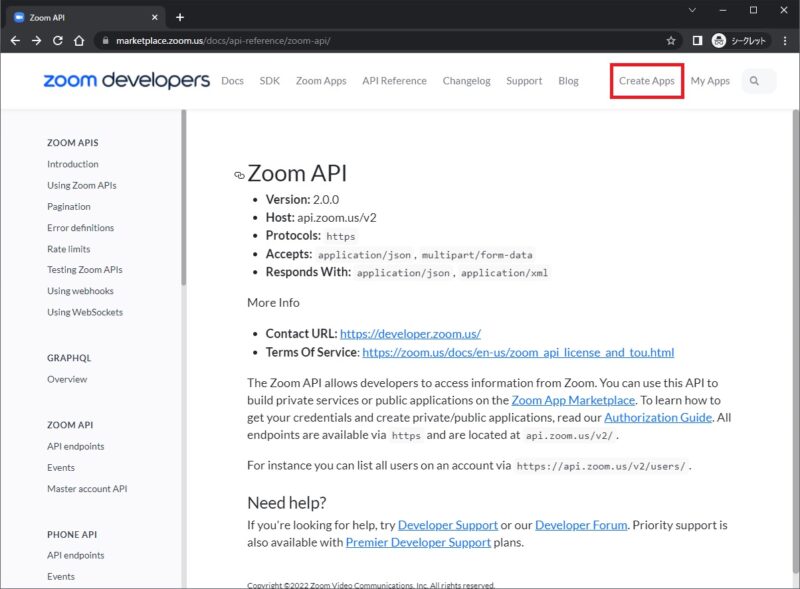
こちらのCreate Appsをクリックします。
https://marketplace.zoom.us/docs/api-reference/zoom-api/
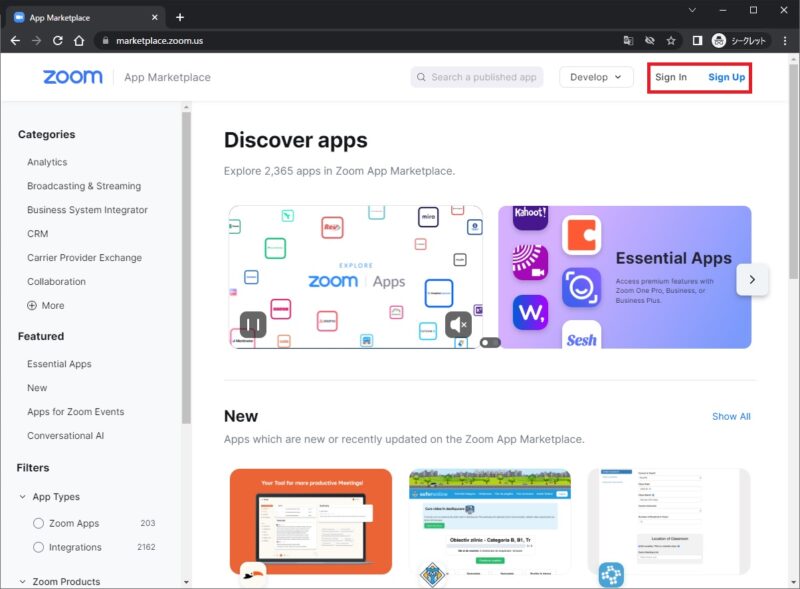
Sign In または、Sign Upからサインインします。
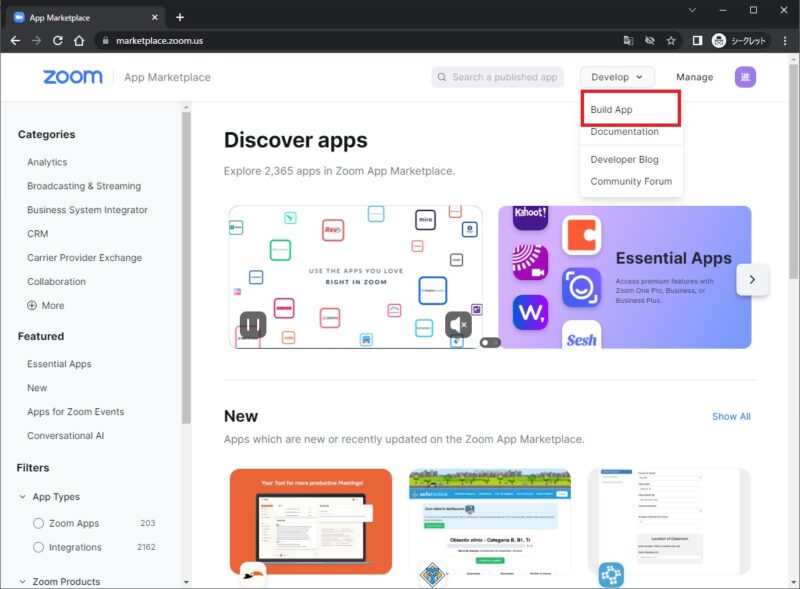
Build Appメニューをクリックします。
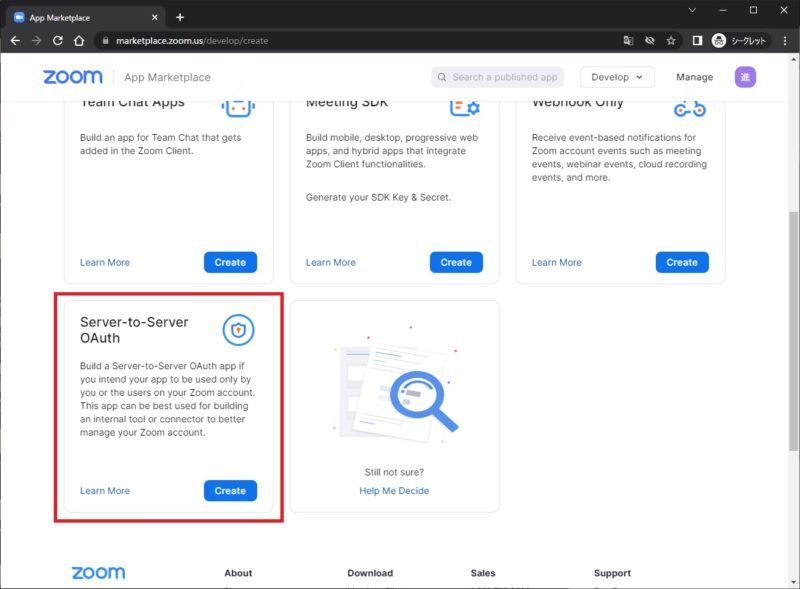
Server-to-Server OAuthのCreateをクリックします。
App Nameを入力してCreateボタンをクリックします。
なお、入力値は何でも良いです。(ZoomAPIを使う方には影響ありません)
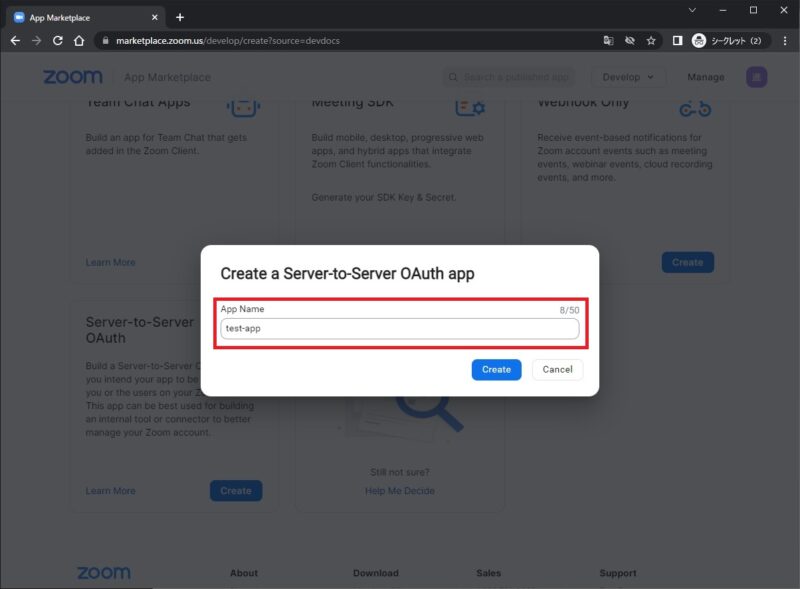
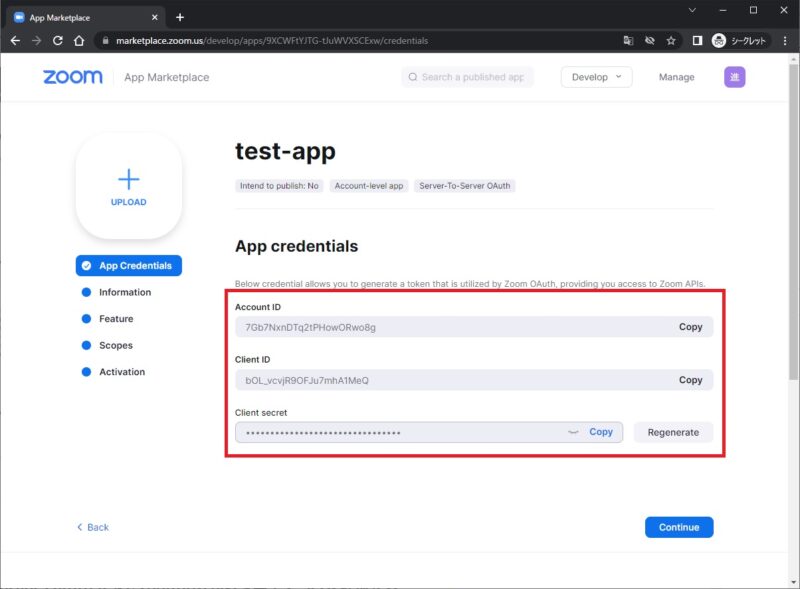
「Account ID」「Client ID」「Client secret」が発行されます。Server-to-Server OAuth認証に必要なので必ずメモしておきます。メモしたらContinueボタンをクリックします。
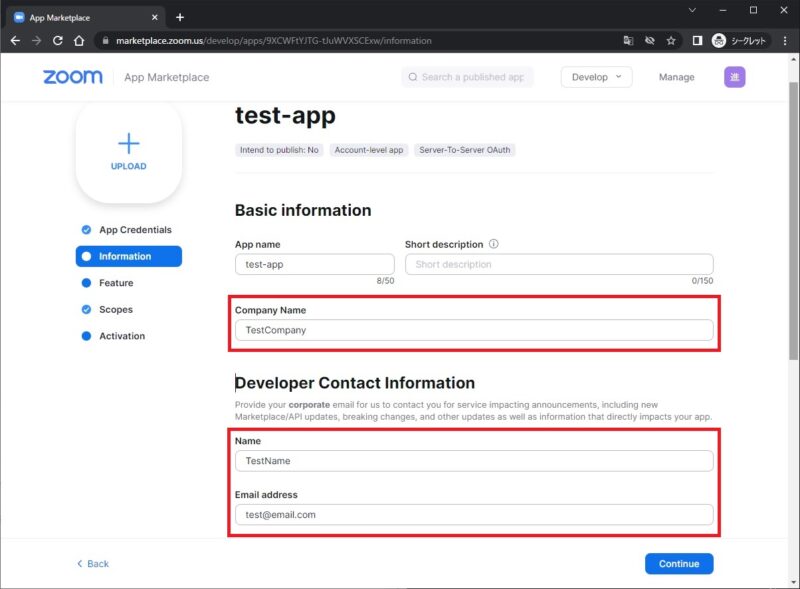
「Company Name」「Name」「Email address」を入力してContinueボタンをクリックします。
なお、入力値は何でも良いです。(ZoomAPIを使う方には影響ありません)
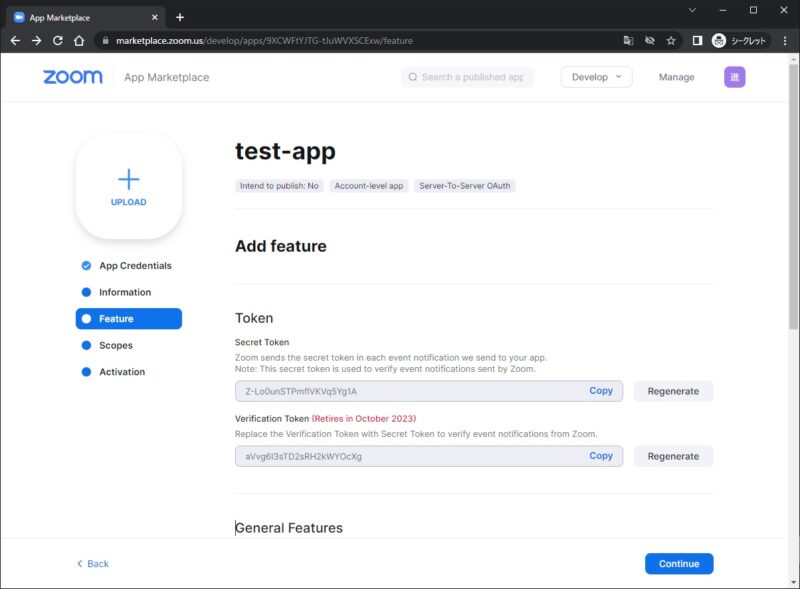
何もしないでそのままContinueボタンをクリックします。
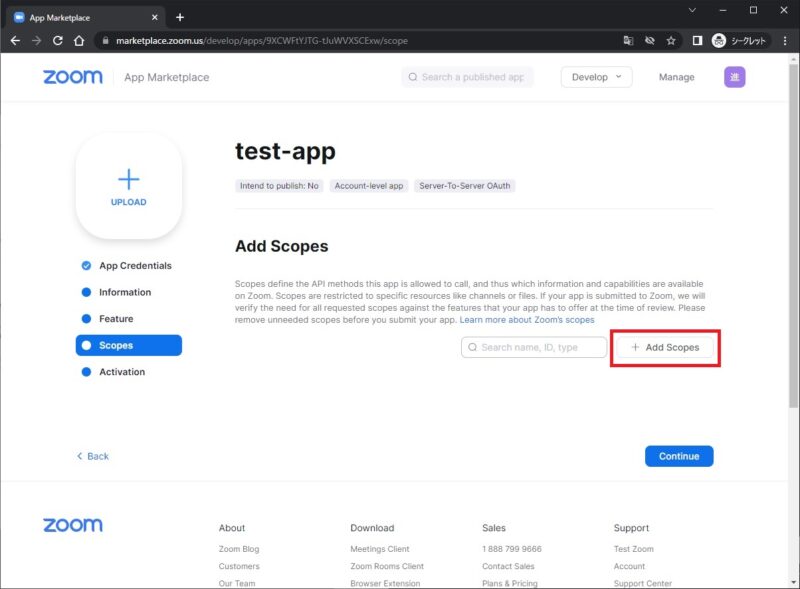
このアプリに権限を与えるためにAdd Scopesボタンをクリックします。
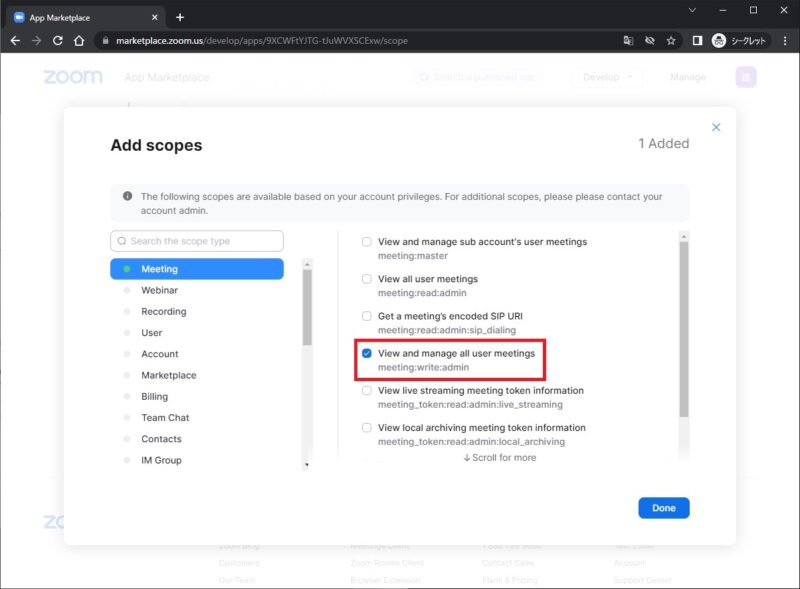
今回のサンプルプログラムは会議の作成だけなので「View and manage all user meetings」にチェックを入れてDoneをクリックします。
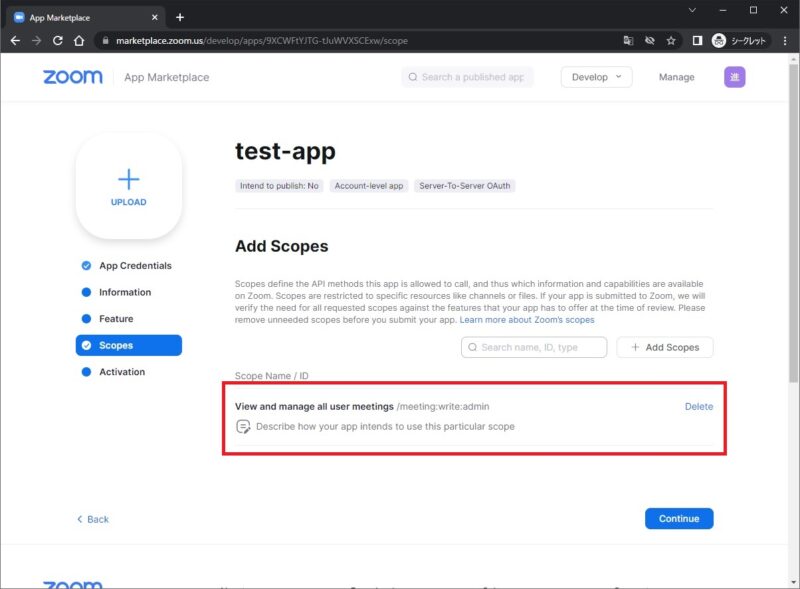
「View and manage all user meetings」が追加されているのを確認したらContinueボタンをクリックします。
Activate your appボタンをクリックしてアプリをアクティベートします。
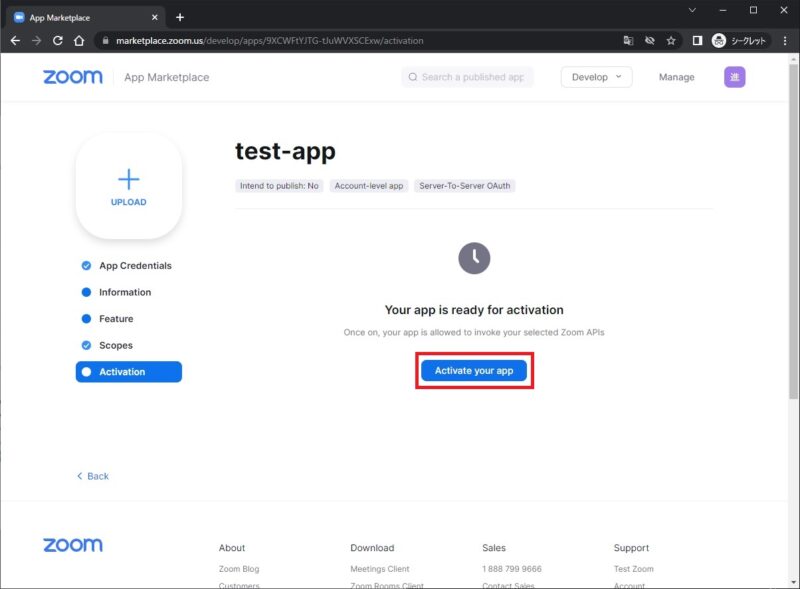
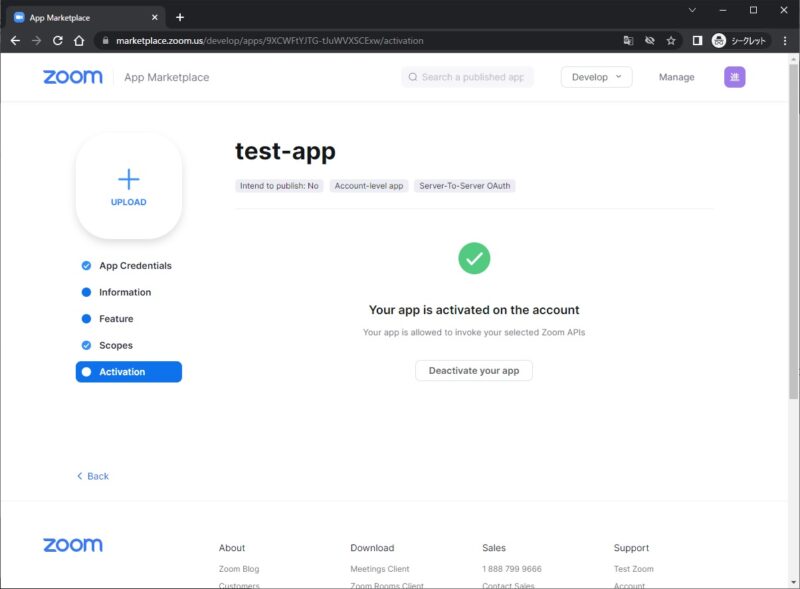
以上でアプリの登録は完了です!
Server-to-Server OAuth認証でZoomAPIからミーティングを作成する
こちらがZoomAPIのラッパークラスになります。
会議作成メソッド(create_meeting)でアクセストークンを取得してZoomAPIのCreate a meetingのエンドポイントをコールして会議を作成しています。
import json
from base64 import b64encode
from http import HTTPStatu

import requests


class ZoomAPI:
    @classmethod
    def _get_token(cls):
        url = f"https://zoom.us/oauth/token?grant_type=account_credentials&account_id={cls.account_id}"

        b64_client = f"{cls.client_id}:{cls.client_secret}".encode()
        b64_client = b64encode(b64_client).decode()
        headers = {"Authorization": f"Basic {b64_client}", }

        r = requests.post(url=url, headers=headers)
        if r.status_code == HTTPStatus.OK:
            return r.json()["access_token"]
        else:
            raise Exception("アクセストークンの取得に失敗しました。")

    @classmethod
    def create_meeting(cls, topic=None, start_time=None, duration=60):
        # アクセストークンを取得する
        access_token = cls._get_token()

        # ミーティングを作成する
        url = "https://api.zoom.us/v2/users/me/meetings"
        headers = {
            "Authorization": f"Bearer {access_token}",
            "Content-Type": "application/json",
        }
        payload = {
            "topic": topic,
            "start_time": start_time,
            "duration": duration,
            "timezone": "Asia/Tokyo",
        }
        r = requests.post(url=url, headers=headers, data=json.dumps(payload))
        if r.status_code == HTTPStatus.CREATED:
            return r.json()["join_url"]
        else:
            raise Exception("ミーティングの作成に失敗しました。")
上記のアプリを登録して取得した「Account ID」「Client ID」「Client secret」を、ZoomAPIのラッパークラスのクラス変数にそれぞれ代入してcreate_meetingメソッドを呼び出します。
ZoomAPI.account_id = "XXX"
ZoomAPI.client_id = "XXX"
ZoomAPI.client_secret = "XXX"

try:
    topic = "サンプル会議"
    start_time = "2022-12-17T15:00:00"
    meeting_url = ZoomAPI.create_meeting(topic, start_time, 30)
    print(meeting_url)
except Exception as e:
    print(e)
サンプルプログラムから一部抜粋して解説
HTTPヘッダーは特殊記号を使用できないので、アクセストークン取得時にClient IDとClient secretをBase64にエンコードしています。
b64_client = f"{cls.client_id}:{cls.client_secret}".encode()
b64_client = b64encode(b64_client).decode()
headers = {"Authorization": f"Basic {b64_client}", }
ZoomAPIのCreate a meetingで設定しているパラメータを説明します。
payload = {
    "topic": topic,
    "start_time": start_time,
    "duration": duration,
    "timezone": "Asia/Tokyo",
}| パラメータ | 説明 |
|---|---|
| topic | 会議のタイトル |
| start_time | 会議の開始時間(yyyy-MM-dd T HH:mm:ss形式) |
| duration | 会議の時間 |
| timezone | タイムゾーン |
その他のパラメータはCreate a meetingのAPIリファレンスをご参照ください。
https://marketplace.zoom.us/docs/api-reference/zoom-api/methods/#operation/meetingCreate
まとめ
以上がPythonでServer to Server Oautu認証によりZoomAPIを使って会議を作成するサンプルプログラムでした。
参考サイト
https://marketplace.zoom.us/docs/guides/build/server-to-server-oauth-app/

